Wednesday, November 23, 2016

Thanksgiving!!!!! Floral Arrangements and Nancy's New Dining Room

Here it is Thanksgiving eve.............
Wow..........
I've been working on my client, Nancy's, new house.
Particularly, getting the dining room ready for
the first Thanksgiving dinner she will be fixing
for several years.
(She lived in a condo previously with no dining room.)
Here's the new dining room....
Nancy got this awesome MCM dining set 
from Epoch Furnishings.
The rug was one we ordered for her 
basement bedroom in her previous home.
Works great in this room.
And the light fixture was just added.


So...
here's what I've been busy with.
She needs some furniture -
a buffet/sideboard, and something smaller
on the shorter wall.
A focal point for the wall..
She wants a festive holiday centerpiece for 
the table,  and a long table runner.

I finished last night!!!!!!
Whew...
 I spied this little piece recently 
I thought it was interesting........
so I bought it!
 I taped off the bottom shelf.....
And used this...
to spray paint the old sewing machine base.
Now it looks like iron again!
And then on the wood parts,
I simulated a reclaimed wood technique..
My arsenal
of products.
 I left the existing paint,
and just started layering stains...
wiping off, until I liked the patina.
 Now it has a total industrial vibe!
 I love it!!!!
And here it is in the dining room.
I propped it with Nancy's crystal decanters,
and a thrift store lamp I painted.
 
I also found  this awesome mirror.
It goes great with the MCM vibe.
I  hung it on the opposite wall,
below which 
one day will be a serving piece/buffet.
The table is rather narrow and long,
and I couldn't find a runner that was long enough.
So yesterday I whipped up this custom runner 
using fabric in my stash.
And I shopped for all the items to use for the centerpiece.
I used a basket, inserted a plastic liner and wet foam,
and then added various cut flowers. on a slant to keep the arrangement low.
I also added some dried eucalyptus
for the delcious aroma.
I ran evergreens along the runner on each side of the basket
 and then added various fruits and vegetables:
Pomegranates, lemons, and squash.
And finally, I placed several LED flameless candles.
(Don't want to set the eucalyptus aflame!)
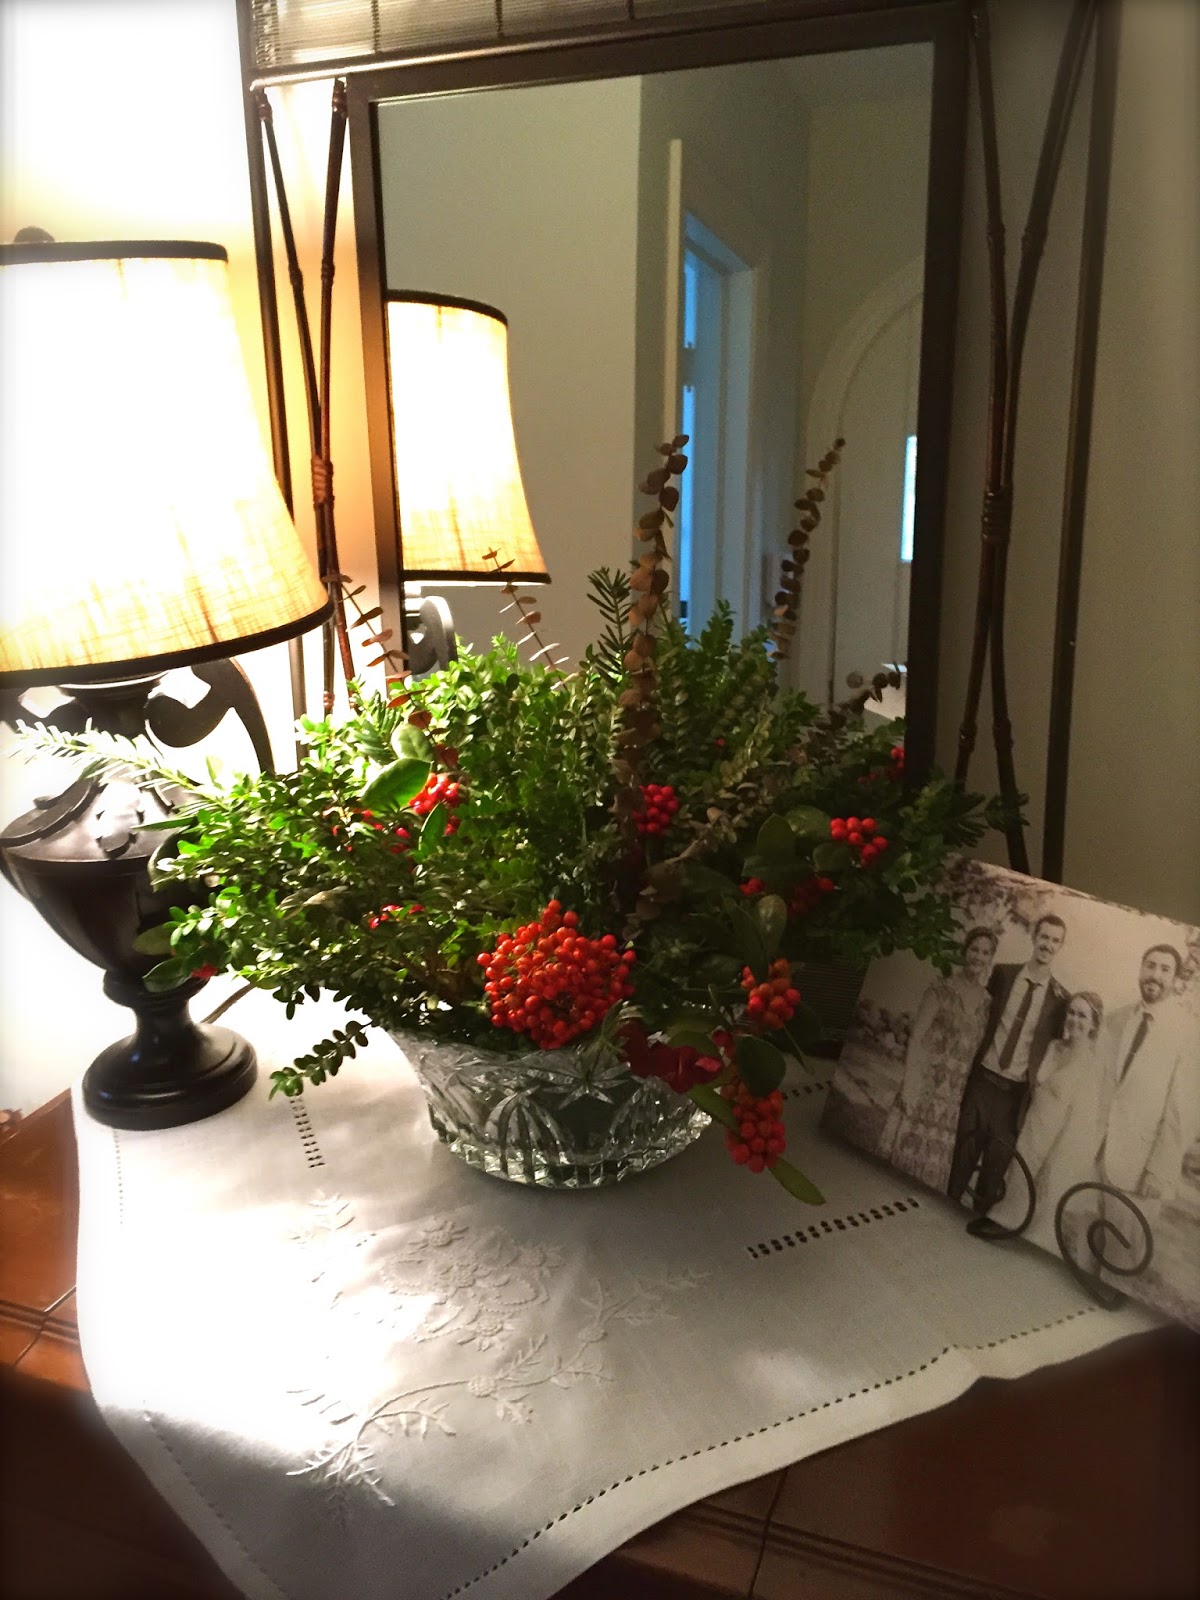
I used more evergreens - yews, holly and nandina -
to create this arrangement which I placed 
in a beautiful crystal bowl of Nancys.
It greets you as you come into the front foyer.

Wow! Look!! I'm a floral designer!!!!!!!
You can do it!
Have no fear!!!!! 
(That's my secret weapon!)

Happy Thanksgiving to all of you.
May your holiday be filled
with wonderful food and family and friends.

And for those of you who are dealing with loss and hardships,
I pray for your peace and comfort.

Blessings to you all!

----------------------------------------
Christmas is just around the corner.
Decorating needs?

SheShe, The Home Magician
Sheila Fox
sheilafox@aol.com
804-402-4370


Friday, November 4, 2016

A $400 Kitchen Spruce Up


 Sometimes,
I just can't have my way....
Wah Wah.
So I have to let go, and
 just do my very best under the circumstances...
I was brought in on a consult last week for this kitchen.
The owner had to put the house on the market.
QUICK!
I'm sure you've seen these cabinets a zillion times.
Almond melamine,
no hardware,
and woodtone strips.
You find them in a lot of rental units.
The laminate countertops had some edging issues.
 And there was a lot of water damage 
to the drawer fronts under the sink...
The melamine had chipped off,
and the MDF had swollen from
the moisture.
The ktchen walls were a dingy yellow.

Here were my recommendations:
I would paint all the cabinets.
White uppers, and a mid blue-grey tone
for the base cabinets 
to tie in the stainless appliances for a streamlined look.
To add some dimension, 
I would add panels of beadboard wallpaper to the doors
surrounded by thin moulding.
Sort of like this...
And I would add some satin bar pulls.
I would paint the walls a soft light grey,
and add this backsplash:
An awesome self-adhesive stainless steel tile I found
at Home Depot.

BUT...

I then found out the work could not exceed $400.
Eek.

The owner really wanted black or metallic doors
for an industrial vibe. 
And she wanted to keep the woodtone cabinets and trim.
And that was all she wanted to invest....
I was very concerned that black cabinets 
would just create a "black hole."
So I did up some paint samples on one of the cabinet doors:
Two metallics and a deep charcoal.
My recommendation was the top:
A stainless steel appliance epoxy
which had to be shipped. 

The house had to go on the market in a week.
So we went with the middle option: 
A flat antique nickel.
And so....
All the doors were removed and numbered.
All the doors and drawer fronts were spray painted two coats,
and replaced after they dried.
I wish we could have at least changed the wall color. (Pout.)
But the walls were left as is.
I filled the countertop hole with wood putty.
I added a mirror for some extra light over the sink.
To fix the sink cabinet drawer fronts,
I cut to size and painted a long strip of hardiplank.
Then used a power adhesive to attach.
Then I wiped down all the wood 
with Howard's Restor-a-finish in Dark Oak.
Added the chopping block,
a few props,
and it's ready for market.

It's not perfect...
 But it's definitely BETTER.

Have a kitchen that needs some cosmetic lifting?
I can help!!!!!
SheShe, The Home Magician
Sheila Fox
sheilafox@aol.com
804-402-4370


Thursday, November 3, 2016

EIleen and Joe's: Sprucing up a Sitting Area and Preparing....A NURSERY!!!!!!!!!!!!


One of my recent projects 
has been getting a few things done
for clients Eileen and Joe.
They had this victorian parlor set in their master suite.
It wasn't really "them," 
but the upholstery was in excellent condition,
so they wanted to make it work...
Specifically, 
they wanted a  new end table to replace this wrought iron table
that was a temporary fix.
And they wanted a coffee table.
(If you're looking for a specific item, let me know!!
I'm always on the hunt for things, 
and can always add your wishlist to the pot!)
I found this little frenchy table...
It had some serious veneer issues...
I patched the top with wood fill.
Sanded, and painted the base in Annie Sloan Chalk Paint
in French Linen.
I left the drawers natural..
And added some gold gilding wax to the hardware
and some of the details.
Here's a close up of the distressing.
And....
I also found this coffee table,
but the top was ugly.
I stripped the top, painted the edge and base.
OMG, look at the burled wood top now.
Gorgeous!
Here's the little area now.
Much improved...
all they need now is an area rug.
But THIS room is the priority.
Why?

Because it's going to be the nursery for the baby
that Eileen and Joe are expecting in November!!!
Woot! Woot!
They have this MCM dresser they want me to paint...
As well as the hardware.
This artwork is providing the color inspiration...
The back wall will be a deeper accent wall.
The other three, a bit lighter.
I painted many color swatches all around the room.
Don't pass over this step!
You'll be sorry!!!
It actually took quite a bit of time to decide on the colors.
While we mulled over that,
I got to work on the dresser.
I sanded, and then used a good primer.
I removed all the hardware..
Primed these as well...
 Then spraypainted silver.

 
Once the primer dried, I sanded and then painted.
Several coats were necessary.
I replaced all the hardware.
Looks brand spanking new!!!!!!
 WHAT an improvement!
And finally, a decision was made on the wall colors:
Sherwin Williams Aquarian for the accent wall.
And SW Bora Bora Shore for the other walls.
 
And a couple of days later....
It's all ready for the arrival!!!!
I added a few quick accessories...
But I didn't want to take away the pleasure they will have
in decorating this new nursery!
Here's mother-to-be showing off the new crib.

(I'm happy to report her healthy baby boy was just born!!!!!!!!
Congratulations, Eileen and Joe!)